Monday, September 30, 2013

White Bean Spread


Vegan or not, hummus eventually gets kind of boring. Especially because it seems like the one vegetarian option on any menu is always hummus-based. I get it; wrap up some generic vegetables with lackluster hummus in a colored-tortilla and charge me $8. Whatever. The lack of imagination while eating out is mundane enough, the least I can do is switch it up when I'm at home. To support my boyfriend's meth-like hummus addiction, I  tend to whip up a batch at least once a week. To keep us from constant tahini stench, I've done my share of experimenting with hummus, adding every seasoning, herb or vegetable I could think of (I've even made pizza hummus!). But, no matter how many creative, interesting batches of hummus I've made, it's still just hummus. 

For some reason though, once you take the basic concept of hummus and switch up the beans, suddenly you've created hummus' sexy, carefree cousin. This is a recipe I made once for Big Girls Small Kitchen's delicious roasted eggplant sandwich last summer and just recently dug it back up. The best part about this spread? It goes with literally everything. Use it as a dip for fresh veggies, pitas, or in place of mayonnaise on any vegetable sandwich. Sometimes, I just eat it with a spoon. 

note: Cara's recipe is one of the best sandwiches I've ever had, by the way, so I highly recommend trying it as you harvest those eggplants from the garden!


You can use a can of any white bean (canellini, navy or great northern), but of all I've tried, I prefer cannelinni. Great northern beans are a little grainy and nutty, while cannelini's are perfectly creamy. 

Drain and rinse the beans, and toss them in your food processor or blender. 


You are also going to need 1-2 cloves of fresh garlic, the juice from half a lemon, and some herbs. A few sprigs of fresh thyme will go perfect in this, otherwise a teaspoon of dried herbs, such as rosemary, works alright too. Feel free to play with your favorite herbs, and whatever you have on hand. I went ahead and used both fresh thyme and dried rosemary this time around. 


Add all ingredients, along with a tablespoon of olive oil and blend until smooth, adding salt and freshly ground black pepper to taste. You may have to another tablespoon of olive oil if it is still coarse.


And that's it!


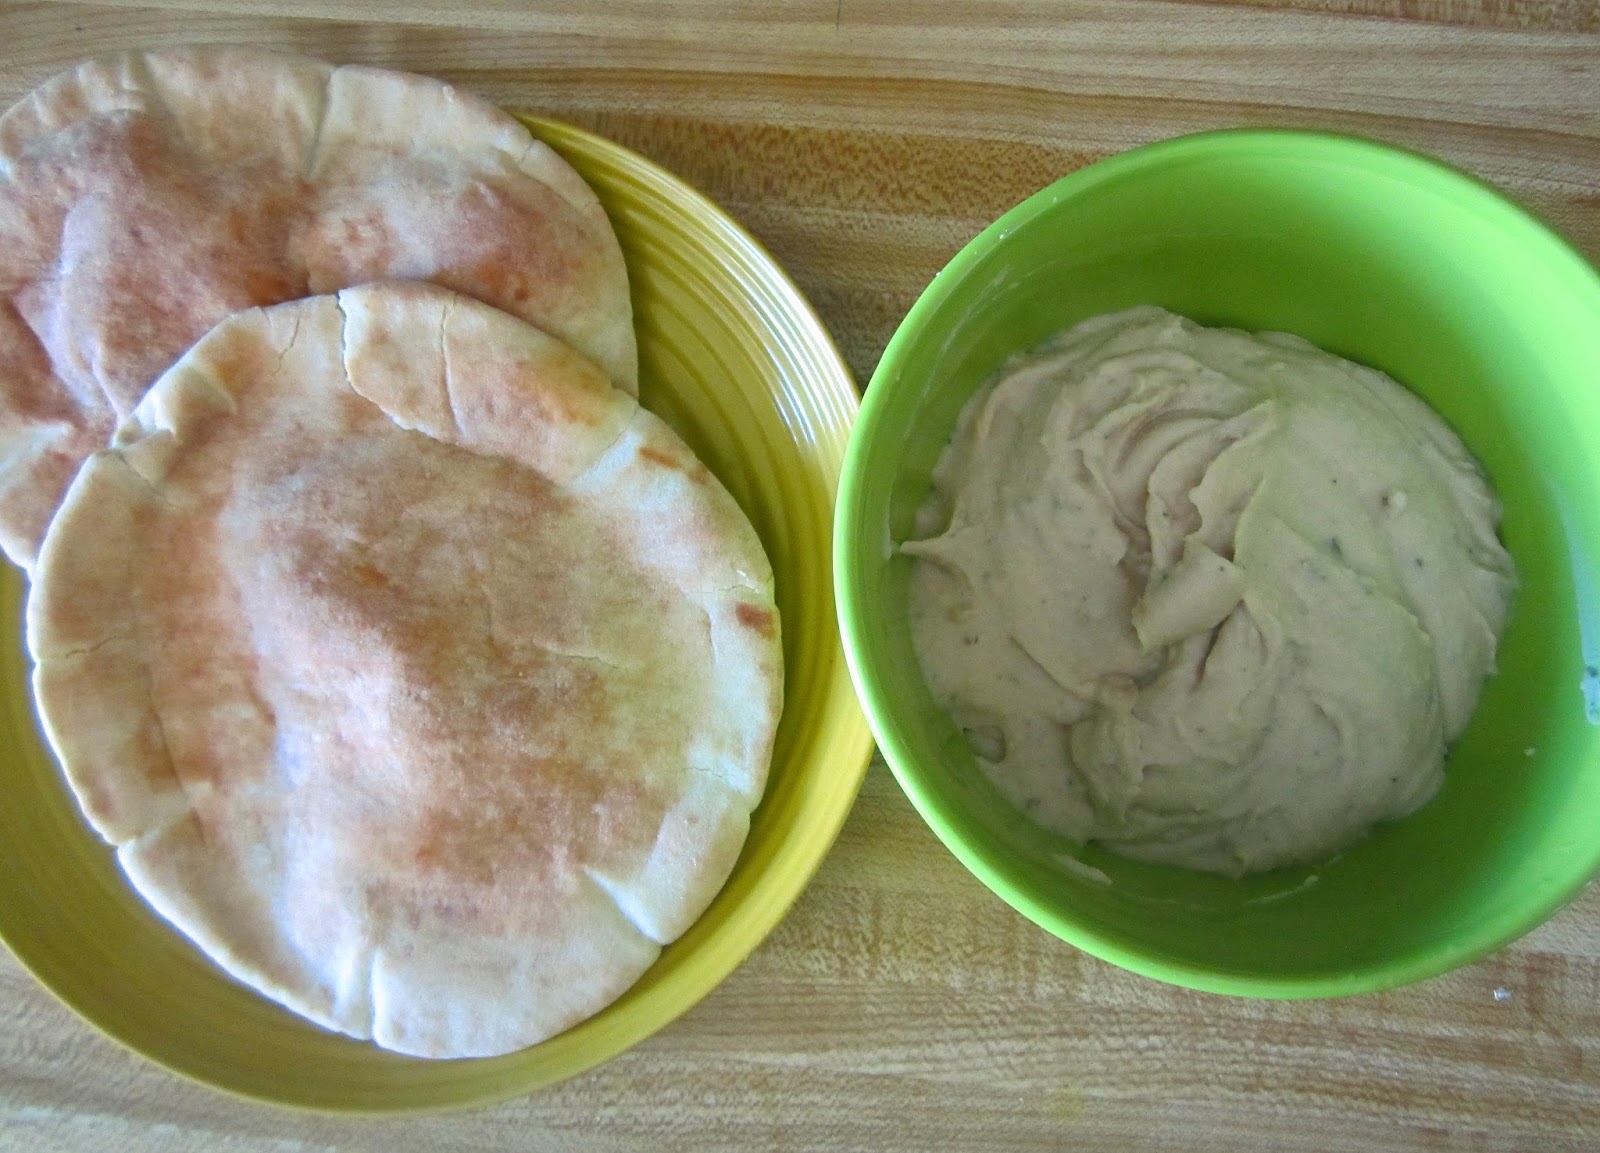
Serve with warmed pita, and you have a perfect snack in just a few minutes. 


White Bean Spread
total time: 5 minutes
makes 2 cups

Ingredients:
1 can white beans
1 tbsp olive oil
2-3 sprigs of fresh rosemary or thyme (or 1 tsp dried)
1 garlic clove
juice of 1/2 a lemon
salt and pepper to taste

Drain and rinse beans. 

Add all ingredients to food processor or blender and puree a few minutes until smooth. 

Saturday, September 28, 2013

French Toast with Berry Syrup


Have you caught on how much I love breakfast? French toast was one of the first things I ever made vegan, and looking back, it doesn't even seem accurate distinguishing this as "vegan" because it's just french toast, minus an egg. Ridiculously easy, and a tad healthier... leaving room for extra powdered sugar.

Now, my family has been making batches of syrup from scratch during brunch my entire life. I'm pretty sure because most of the time we couldn't afford buying bottles of syrup, at least not at the rate my five brothers would find necessary to pour into their mouths for any given reason on a Tuesday afternoon. And eventually, I realized I never had the taste for pre-bought syrup anyway. But, there was one exception: Knott's boysenberry syrup. The slender bottles of purple gold my mother and I would tuck safely behind the condiments hidden from greedy sugar-raving children. Perfect for crepes, french toast, ice cream, nachos... (okay, really I actually tried that once so judge away). And then, one day not to long ago I realized I couldn't find any of my prized boysenberry syrup at the grocery store anymore. Apparently they decided to break my heart and sell the recipe to Smuckers. Well, I don't trust Smuckers. So what's a Hoff to do? 

Make it my damn self. All of it. 


And it is damn good. So, let's brew some coffee and go for it, already. 


I like to start with the syrup. Use 2-3 cups of whichever berries you prefer. I went with blueberries today, since I always have frozen blueberries on hand. Raspberries, blackberries, strawberries, boysenberries...all of them equally delicious. Technically, you can use fresh or frozen, but since the berries will be cooked down and fresh are usually considerably more expensive, there really is no reason not to use frozen. In fact, take my advice and stock up on frozen berries each shopping trip. Berry season isn't an all-year privilege. 


First, lightly pulse the berries in a food processor (if you are using strawberries, chop them up a little bit first). You just want them a tad blended to boil down. Add 1/8 cup water and bring to boil, then simmer at medium low for 1-2 minutes with a lid. 


Strain the berry mixture through a metal strainer, using the spoon to ensure all the juicy goodness gets through. 


Pour the berry liquid back into the pot and combine 1/2 cup sugar. Cook on medium-high about 1-2 minutes until the sugar is dissolved. Bam! Perfect, easy, quick homemade berry syrup. Keep it to the side while you do the french toast, and warm it just before everything is ready. 


This is all you need for the batter (minus the coconut oil for frying). See? Not too different than what you are used to. 


Except for this. This egg replacer is a very useful item to have in your pantry, though it isn't totally necessary here. One banana will do for one batch, but I like adding a tablespoon of egg replacer to make the batter more creamer-like. All it is is a combination of flours and starches, so don't be afraid. 

Now, there are a ton of egg substitutes one can use- flax seed, applesauce, tapioca starch, flour etc.- but I've found bananas go best in french toast. And why not add a little more healthy fruit to the meal. Isn't that the point of omitting the egg after all?


Slice a loaf of bread into 1-2 inch slices, or however thick you like it. I used a putliese loaf, which is comparable to ciabatta. The extra crunch of the crust beside the moist french toast just makes me a happy fat kid. But, of course day-old sourdough or french loaf will do. This batter should be able to soak 8 thick slices. 


To create your eggless batter, start by mashing the banana into baby-food mush. That made it sound really tasty, right? Well, I happen to like banana baby food, so deal with it. 

Then pour in the almond milk, and mix in the egg replacer if you're using it, nutmeg, cinnamon, and vanilla extract. Now, if you use vanilla almond milk, you probably don't need the extract as well, unless you're one of those people that chew on vanilla bean all the time. Exactly, there aren't those people.


Soak your slices for a bit on each side until the batter soaks up the bread all the way through. 

Heat up your griddle to 350 degrees (or medium high if you are on the stove top) and brush coconut oil onto it. 


Cook up five or seven or ten minutes or so on each side until golden brown. 


Is it just me or does french toast take FOREVER to cook??


Oh, but it is sooooo worth it. Top it off with warm berry syrup, powdered sugar, and fresh berries. Perfection is served. 


French Toast and Berry Syrup
Prep time: 5 mins Cook time: 20-30 minutes
Total time: about 30-40 minutes 
Makes 8 thick-cut slices

Berry Syrup:
2-3 cups frozen berries
1/8 cup water
1/2 cup sugar

French Toast:
loaf ciabatta bread
1 cup almond milk
1 ripe banana
1 tbsp egg replacer (optional)
1/4 tsp nutmeg
1/4 tsp cinnamon
2 tsp vanilla extract
coconut oil (for frying)

For syrup:
Lightly blend berries in food processor. Combine with water in a pot and bring to boil. Simmer on medium-low 1-2 minutes, covered. 

Strain berries in metal strainer. Combine liquid and sugar back into pot and cook on medium-high until sugar is dissolved for another 1-2 minutes. 

Serve warm. 

For toast:
Slice bread into thick slices. 

Mash banana into large bowl. Add egg replacer, milk, vanilla and spices and mix well. 

Brush coconut oil on heated griddle (350 degrees or medium-high). Soak each slice of bread in batter and fry on griddle 5-10 minutes on each side or until golden brown and cooked all the way through. 

Top with warmed syrup and other toppings. 


Wednesday, September 25, 2013

Italian Herb Polenta Cakes


Yes, I'm finally going to give an easy, not-from-scratch meal. Even I don't feel like spending an hour or more in the kitchen all the time.

When grocery shopping, I usually pick up a few products to get me through those busy (or more often than not, lazy) days, and to prevent me from going all in and giving in to the black hole habit of take-out. 


So here are some not-so-cheating products I picked up: pesto paste (unintentionally vegan- love when that happens), and a tube of pre-seasoned polenta. I was able to find both at the "regular" grocery store, though I've also seen packaged polenta at other stores, including Sprouts. Both items are just a few bucks each, and will save you tons of time and dirty dishes by just having them on hand. 

Since my polenta is styled with Italian herb, I chose grape tomatoes, parsley, and green onions to accompany it. 


Annnnnnd pine nuts. I just love pine nuts. They are creamy, earthy, and go perfect with Italian herbs. Plus, since I don't have to make my own pesto for this, I have some extra to actually eat. This is going to be a good day. 


First start by slicing the polenta into 1/2 inch thick cakes. 


Heat up 1-2 tbsp of olive oil, and fry up the cakes for about 3-5 minutes on each side. They should have hints of golden brown, but remain spongy. Note: don't saute garlic in the oil prior to frying them like I did. Charred garlic = not tasty.


While the cakes are cooking, chop up the veggies. I like to slice my green onions diagonally and chop my grape tomatoes in fours to keep them thick and juicy. 


Once the polenta cakes are cooked, spread some yummy pesto on top. As much or as little as you like, but a tsp per cake should be sufficient. 


Then, start stacking the veggies!


There really is a science to throwing piles of vegetables on a plate. I should get paid for this. 


Finish off by squeezing some fresh lemon juice on top, and tada! Ten minutes, a few bucks, one pan and no stress. 


Italian Herb Polenta Cakes
Prep time: 3-5 minutes Cook time: 6-10 minutes
Total: 10-15 minutes
Makes about 12 cakes/4 servings

Ingredients:
1 package pre-seasoned polenta
1+ cup chopped grape tomatoes
4+ sliced green onions
1/4 cup minced parsley
1/2 cup pine nuts
olive oil (for frying)
fresh lemon juice (for garnish)

Remove polenta from tube. Slice into 1/2 thick cakes. Heat olive oil in large frying pan and cook cakes for 3-5 minutes on each side until slightly golden brown.

Cut up veggies.

Once cooked, squeeze a dollop of pesto on each cake. Stack veggies on cakes, finishing with pine nuts and parsley  Squeeze fresh lemon on top to garnish.  


Tuesday, September 24, 2013

Sausage Biscuits


Eat your heart out, McDonalds. Literally, if possible, actually. Because this vegan, from-scratch version of a breakfast classic is tastier, healthier, and 100% cruelty-free. 


The best part? Neither the buttermilk biscuits, nor the sausage is difficult whatsoever. In fact, most of this can be prepped beforehand to make morning snappier than popping those rock-hard frozen Jimmy Dean breakfast sandwiches in your microwave, minus the heartburn. 


Let's start with the biscuits. 


Gather your ingredients and preheat the oven to 450. In addition to the kitchen basics shown above, you'll also need almond milk and earth balance butter. Note: taking the butter out now, a few minutes before adding it into the dough is helpful when working with it later. Also, I used sweetened almond milk, to counteract the "buttermilk" flavor that will be emulated.


To duplicate buttermilk, add 1 tsp of apple cider vinegar (Bragg's is always best) to 3/4 cup almond milk. Set aside in fridge to curdle. Just like the real thing. 


Next, combine all the dry ingredients in a large mixing bowl. Then, use a fork to cut the butter into the dry ingredients until the texture is coarse. 


Quickly mix in the milk,


...and form dough into a ball in the bowl. Refrigerate this for 20-30 minutes. 

Now, I will tell you right now I am a terrible baker. This is because I fail to follow what seems to be silly instructions such as chilling the dough. Or preheating the oven. Or using a timer. Or adding baking soda. What can I say- an experimental cook like myself just isn't born with the precise, mathematical patience of a baker. So trust me- if I include a step as necessary, it's because I've tried to skip it and failed miserably, so it's likely pretty important.

Don't go press play on the DVR just yet, though. While the dough is chilling, we can start on the sausage.


Boil 1/2 cup water and gather your dry ingredients. 


Once the water is boiling, turn it off and add 1/2 cup TVP. Stir, and let set for about 5 minutes to allow the TVP to re-hydrate. 


Every vegan kitchen has these two ingredients on hand at all times: ground flax seed, and nutritional yeast. Both necessary for countless recipes, and extremely healthy to add to your diet. Flax in particular is a wonderful binding agent and can be used as an egg replacer, as when combined with water flax becomes extremely gelatinous. In this recipe, this is exactly what it is used for. 


Add in all dry ingredients and spices and mix well to incorporate the flavors completely. 


Now, add the remaining ingredients: Bragg's liquid aminos (or soy sauce), maple syrup, and the liquid smoke mixed with water. 


This is what I mean by liquid smoke in the 1/4 cup water. It doesn't need to sit or anything, but by combining the water and liquid smoke together, the liquid smoke can evenly distribute throughout the dough.


It will look like this when ready. Go ahead, take a pinch and eat it. It already tastes damn good. 


Heat up about 1-2 tbsp of oil in a large skillet (that will fit a lid), and form your sausage patties by hand. One batch should yield about 8 patties. 


Fry them on the skillet at medium-high heat, covered, for about 3-5 minutes, until a nice crispy brown.  


Flip the patties over and reduce heat to medium. Cook, still covered, another 3-5 minutes until they are both steam cooked in the middle and a crispy brown on both sides. They will smell like sausage, and look like sausage, but don't trip out; I promise there are no secret, poisonous ingredients snuck in this recipe.


Now, back to the biscuits. Logically, it is time-efficient to pull the biscuit dough out once the sausage mixture is combined (before making them into patties). This way, the biscuits can be in the oven while you finish up the sausage. It just seemed a bit confusing to go back and forth with pictures and instructions on the blog itself. 

So, remove the dough from the fridge and place on a clean, floured surface. Knead for about 1-2 minutes until smooth.


Roll out dough to about 1/2 inch thick. Cut into rounds using a biscuit cutter or more practically, a small glass jar. You should be able to get 8 biscuits from the dough.


Bake on an ungreased cookie sheet 10-12 minutes in your preheated 450 degree oven.


They should come out looking scrump-dilly-umptious indeed.


Now if you took my advice and timed it right, the sausages will be ready about the same exact time as the biscuits. If not, I won't mention all the times I've used a toaster oven to keep half the meal warm each time I don't time it right either.

Cut these babies in half and liberally spread some butter onto each side. 


Place a patty on each bottom, and make cute little delicious breakfast sandwiches. Double-fisting is, in fact, necessary here. 


Sausage & Buttermilk Biscuit Breakfast Sandwiches
Prep time: 25 minutes Cook time: 10-12 minutes
Total: approx 35-40 minutes
Makes about 8 sandwiches

Buttermilk Biscuits:
2 cups flour
2 1/2 tsp baking powder
1 tsp baking soda 
1/2 tsp salt
4 tbsp butter
3/4 cup almond milk
1 tsp apple cider vinegar

Sausage Patties:
1/2 cup boiling water
1/2 cup TVP
1/4 cup oat bran
1/4 cup whole wheat flour
1/4 cup vital wheat gluten
1 tbsp nutritional yeast
1 tbsp ground flax seed
1 tsp garlic powder
1/2 tsp ground sage
1/2 tsp fennel seeds
1/2 tsp black pepper
1 tsp brown sugar
1/4 cup water/ 1/2 tsp liquid smoke
3 tbsp Bragg's liquid aminos OR soy sauce
1 tbsp maple syrup
oil (for frying)

Preheat oven to 450 degrees. 

Combine milk and vinegar in small bowl, set aside in fridge to curdle and create buttermilk.

Combine flour, baking powder, baking soda and salt into large mixing bowl and mix well. 

Cut butter into mixture with a fork until coarse in texture. Quickly mix buttermilk into flour mixture. 

Form ball of dough in bowl, and set in fridge to chill for 20-30 minutes.

Boil 1/2 cup water in large saucepan. Add TVP and turn off heat, allowing TVP to set for 5 minutes.

Add all dry ingredients to pan: oat bran, vital wheat gluten, whole wheat flour, nutritional yeast, ground flax seed, garlic powder, ground sage, fennel seed, black pepper, and brown sugar. Mix well. 

Add in remaining ingredients (except for oil): liquid smoke (set in 1/4 cup water), Bragg's, and maple syrup. Stir until totally combined. 

Remove chilled biscuit dough from the fridge. Knead dough on a clean, floured surface 1-2 minutes until smooth. 

Roll out dough to 1/2 inch thick. Cut into rounds.

Bake on ungreased cookie sheet for 10-12 minutes.

While biscuits are cooking, cook sausages. Heat large frying pan (that has a lid) with 1-2 tbsp of oil. 

Form patties by hand (about the size of your palm), making 8 total. Fry in oil at medium-high heat, covered with a lid, for 3-5 minutes until brown. Reduce heat to medium, then flip and fry, covered for another 3-5 minutes. When done, the patties should be cooked on the inside, and an even crispy brown on the outside. 

Remove biscuits from oven. 

Cut biscuits into halves. Spread butter along both sides of all biscuits. 

To assemble the sandwiches, simply place a patty on each bottom, and cover with a top. 

Voila!